QR Code Best Practices: Design, Size, Placement, and Testing
QR code design and usage best practices: minimum size, contrast, quiet zone, error correction, print vs digital, and how to test QR codes before publishing.
- qr code
- best practices
- design
- marketing

A QR code that looks good but fails to scan is worse than useless. These best practices ensure your codes are readable across devices, sizes, and real-world conditions.
1. Size: minimum and recommended
The minimum printable size depends on the scan distance:
| Context | Minimum size | Recommended size | Scan distance |
|---|---|---|---|
| Business card | 1 cm (0.4 in) | 1.5 cm (0.6 in) | < 10 cm |
| Flyer / brochure | 2 cm (0.8 in) | 3 cm (1.2 in) | < 30 cm |
| Poster (A4/Letter) | 3 cm (1.2 in) | 5 cm (2 in) | < 50 cm |
| Large poster (A1) | 5 cm (2 in) | 8 cm (3 in) | 1 m |
| Storefront window | 8 cm (3 in) | 15 cm (6 in) | 1-2 m |
| Billboard | 30 cm (12 in) | 50 cm (20 in) | 5-10 m |
Rule of thumb: the scan distance is approximately 10× the code’s physical size. A 3cm code should be scannable from 30cm.
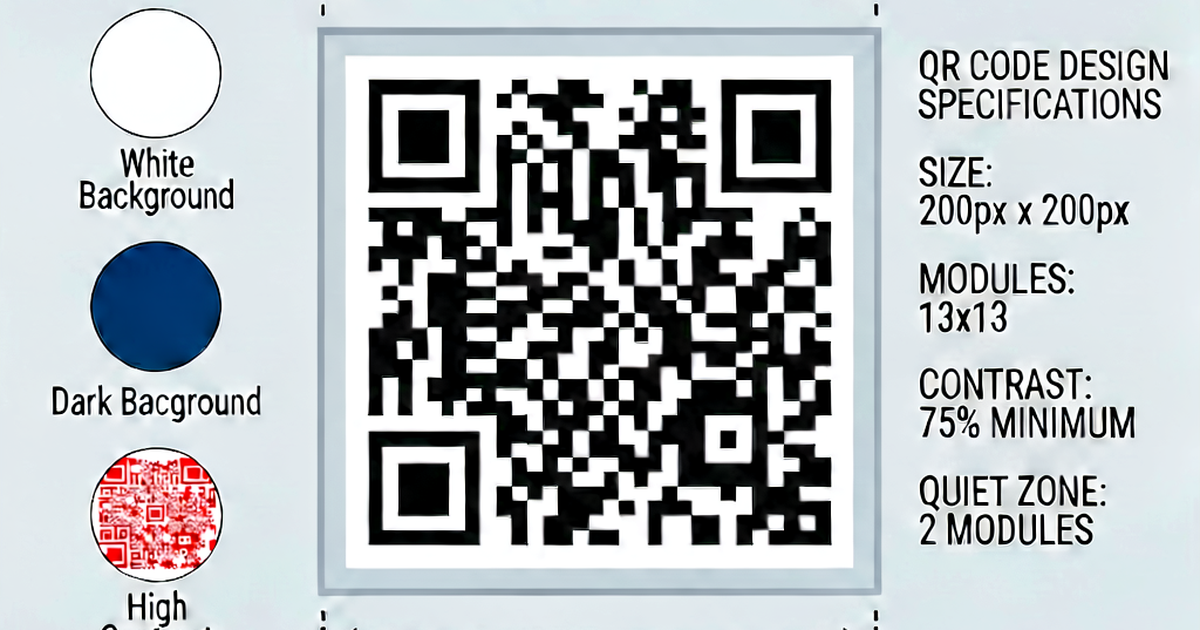
2. Contrast: dark on light
QR codes require high contrast between dark and light modules. Black on white is ideal.
Requirements:
- Minimum 3:1 contrast ratio (preferably 4:1 or higher)
- Dark modules: use dark colors (navy, black, dark brown work)
- Light modules: use light colors (white, light gray, light cream work)
What not to do:
- Dark blue on dark green
- Gray on white (low contrast)
- White on light yellow
Testing: Open your camera in dim lighting. If you can’t scan it in suboptimal conditions, contrast is insufficient.
3. Quiet zone: preserve the border
The quiet zone is the white space around the code. Minimum: 4 modules (the unit size of a small square in the code). On a 2cm code with ~25 modules, that’s about 3mm per side.
Common mistake: Placing the QR code too close to text, images, or page edges. Scanners look for the quiet zone to locate the code boundary.
Leave at least 5mm of white space around the code at any print size.
4. Error correction level
Choose the error correction level based on how the code will be used:
| Level | Recovery | Use case |
|---|---|---|
| L (7%) | Small clean codes on perfect surfaces | Digital display |
| M (15%) | General use, slight wear expected | Flyers, brochures |
| Q (25%) | Codes that may be partially damaged | Labels, packaging |
| H (30%) | Codes with logo overlays | Branded QR codes |
For print materials that will be handled or exposed to weather, use Q or H.
If you’re adding a logo to the center of the code (logo overlay), use H. The logo obscures some modules, and H error correction allows up to 30% of the code to be missing.
5. File format for print
Always use SVG or PDF for print. PNG works at large sizes (300+ DPI) but rasterizes.
Never use JPEG — JPEG compression artifacts on the module edges can make the code unscannable. This is the most common printing mistake.
| Format | Use case |
|---|---|
| SVG | Web, digital, print (vector, scales perfectly) |
| PNG (high res) | Web, digital, print at fixed size |
| Print documents | |
| JPEG | Never (for QR codes) |
For print, request at least 300 DPI. 600 DPI is preferred for small codes.
6. Colors and branded QR codes
You can use colors as long as contrast is maintained:
Dark modules: dark blue (#003366) → OK
Light modules: white (#ffffff)    → High contrast ✓

Dark modules: dark gray (#666666) → risky
Light modules: light gray (#cccccc) → Low contrast ✗
Logo overlay: Place a logo in the center (up to 20-30% of the code area with H error correction). Export the code as SVG and add your logo in a vector editor.
7. Keep URLs short
More data = more modules = denser code = harder to scan at small sizes.
If your URL is long, consider:
- Using a link shortener
- Setting up your own redirect (e.g.,
example.com/qr/menu) - Stripping unnecessary URL parameters
A 30-character URL produces a far simpler, more scannable code than a 200-character URL.
8. Test before printing
Before any print run:
- Scan with multiple devices — iPhone, Android, various app states
- Test in different lighting — bright light, dim room, direct sunlight
- Test at the intended distance — hold the code at the distance someone would realistically scan it
- Print a proof — digital previews look fine; print copies reveal contrast and size issues
- Test the destination — confirm the URL resolves correctly
9. Placement
- At eye level or lower — scanners held below the code angle can struggle
- On flat surfaces — curved surfaces distort the modules
- Away from reflective materials — metallic backgrounds cause glare
- With good lighting — avoid strong backlight or deep shadow
10. Include a call to action
Most people don’t know what to do with a naked QR code. Include context:
"Scan to see the menu"
"Scan for more information"
"Scan to get 10% off"
The call to action dramatically increases scan rates.
Generate QR codes at qrcodegen.io.
Related reading
-
QR Code for Website: Link Any Page to a Scannable Code
Create a QR code for any website URL. Covers URL optimization, UTM tracking, landing page tips, size requirements, and how to embed QR codes in print and digital content.
-
How to Create a QR Code: A Complete Beginner's Guide
Learn how to create a QR code for a website, WiFi, contact, or text. Covers online generators, static vs dynamic QR codes, and size requirements for print.
-
Dynamic QR Code vs Static QR Code: What's the Difference?
Compare dynamic and static QR codes: editability, tracking, URL redirects, and when to use each. Includes use cases for print, marketing, and permanent links.